New in Breeze: Start Dates for To-Dos and Easier Time Selection
We're always looking for ways to make managing your projects and tasks in Breeze feel smoother and more intuitive. Planning out your work often comes down to the details, especially when it comes to timing things just right.
With that in mind, we've rolled out a couple of updates aimed at giving you more control and making date handling a bit quicker.
First, something many of you have asked about: you can now add Start Dates to your to-dos. This should be really helpful for better visualizing your timelines and planning when work should actually begin, not just when it's due.
Second, we've streamlined the process for setting a specific time when you're adding a due date (or a start date). It's a small change, but one we think will save you a few clicks and make scheduling more precise when you need it.
1. Start Dates for To-Dos
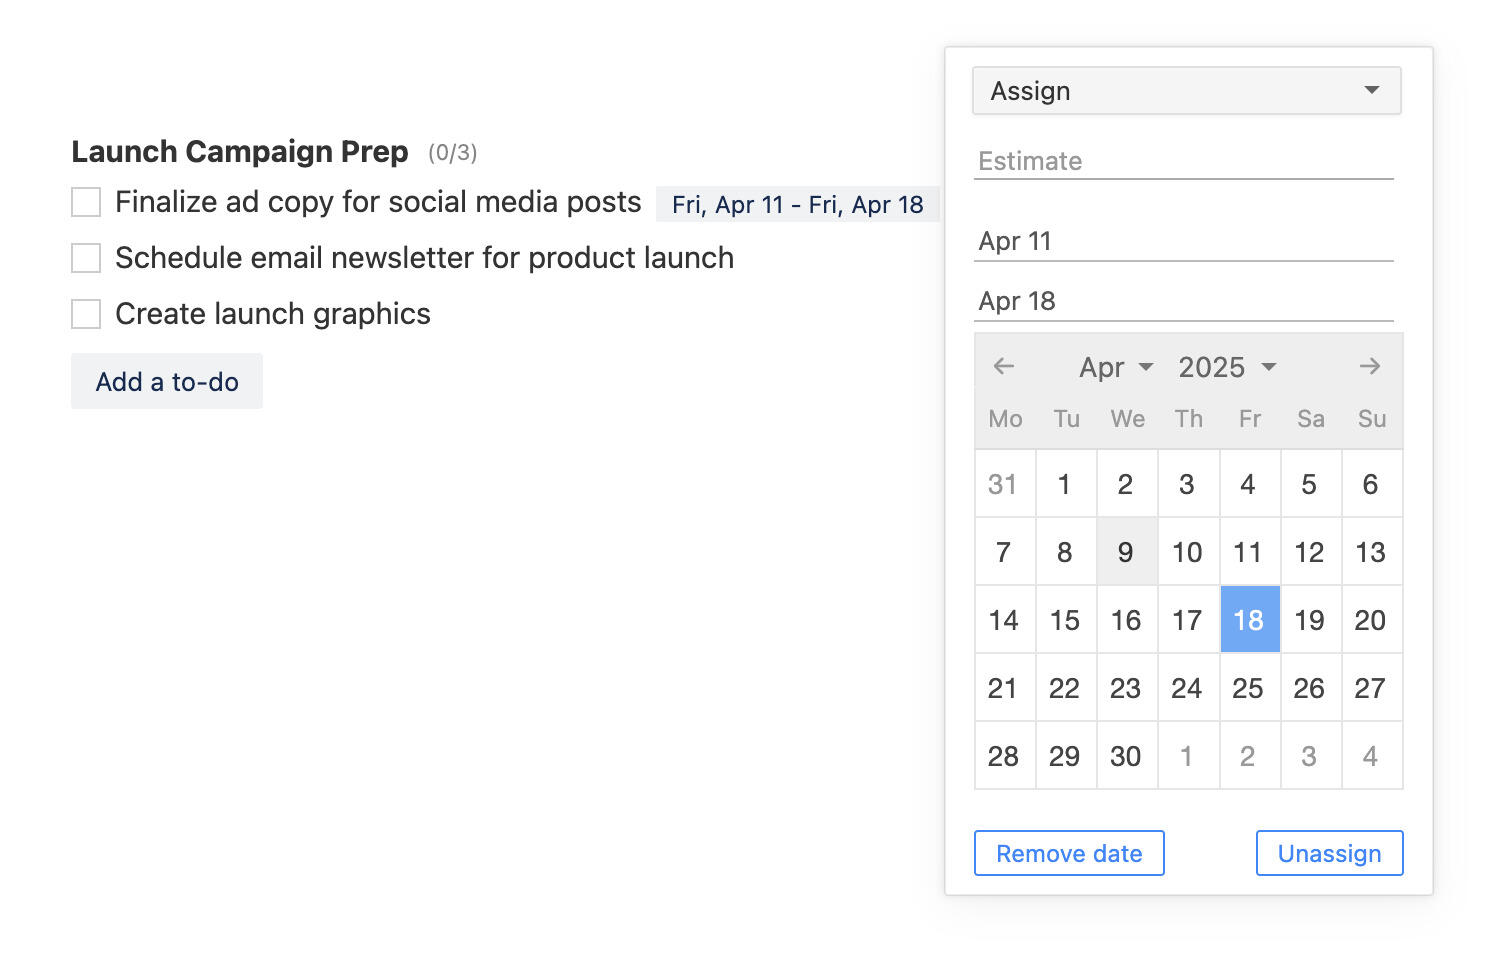
You can now set start dates on to-dos inside tasks and to-do lists. This gives you more control over how work is planned and executed, especially for longer or more structured projects.
Adding a start date helps clarify when a to-do is supposed to begin—not just when it’s due. This is useful when tasks have clear phases, when team members are working across time zones, or when you want to avoid starting something too early. It's a simple way to prevent last-minute rushes and give your team more visibility into what’s coming up.
How to set a start date:
- Open a task and scroll to the to-do list section.
- Click on an existing to-do or create a new one.
- Click the Assign button next to the to-do name.
- You’ll see a new Start date field.
- Pick the start date, the date is automatically saved.
You can add or edit the start date at any time.
Visibility in the Calendar
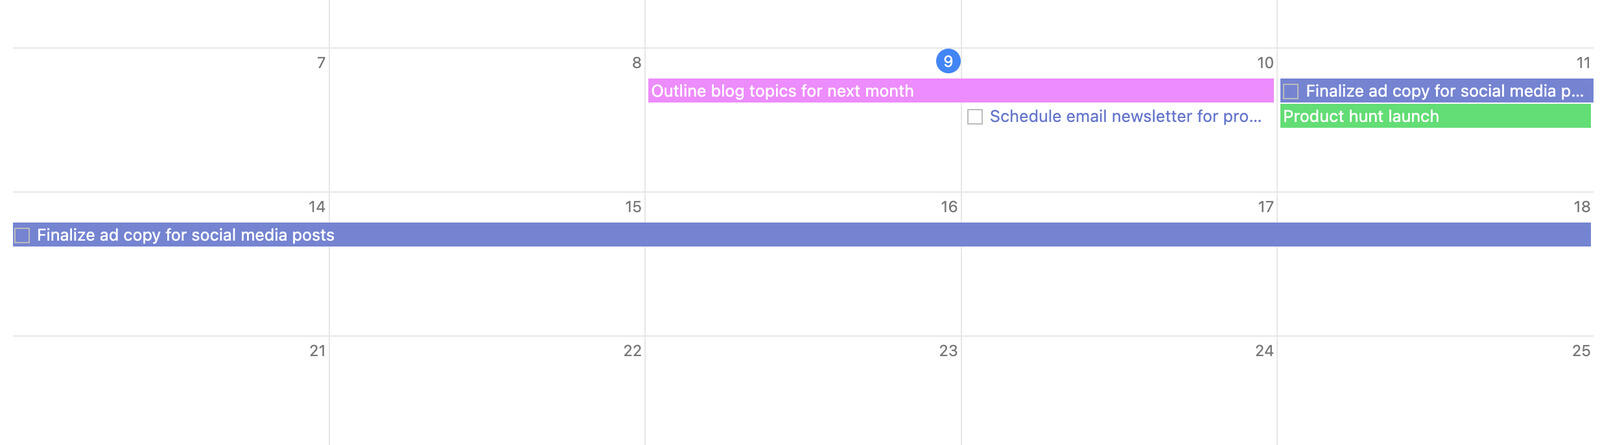
Start dates on to-dos are now visible directly in the Calendar view, making it easier to see not only what's due, but also when work is scheduled to begin. This gives you a clearer picture of your team's upcoming workload and helps prevent tasks from falling through the cracks. You'll also see start dates reflected in the Task timeline, so you can better understand how different pieces of work fit together across a project.
2. Easier Time Selection for Dates
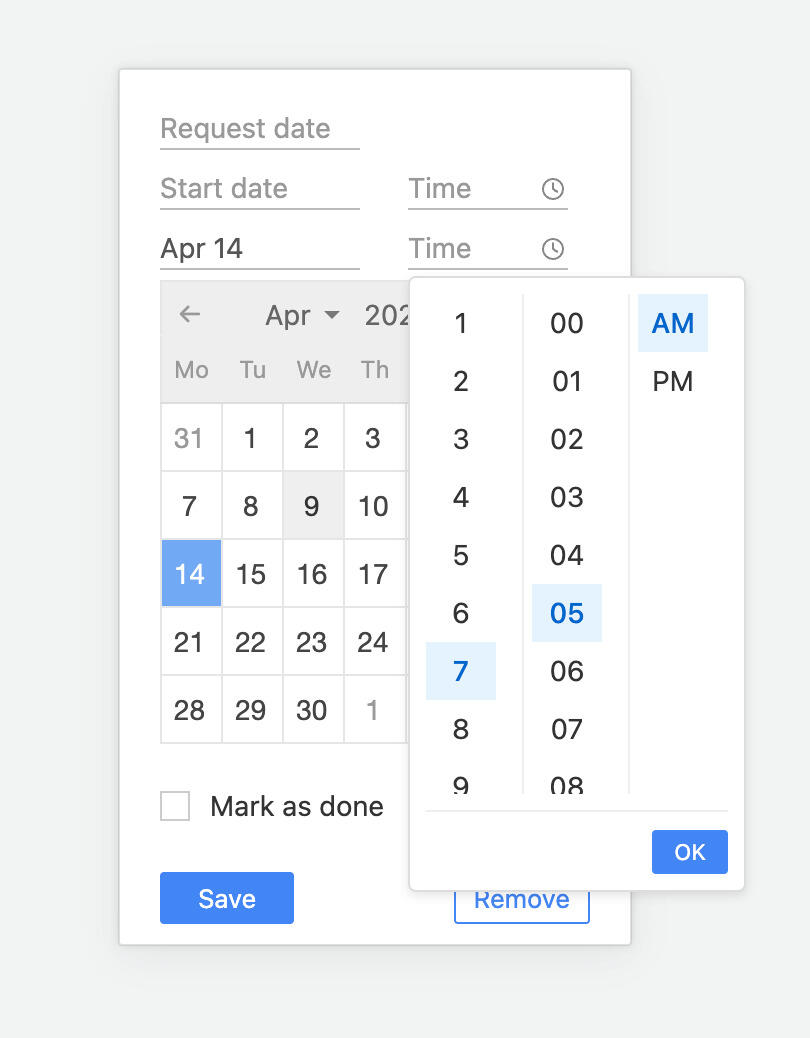
You can now set start and due times for tasks more easily. In the past, time could only be entered manually by typing something like "1pm" into the field. That worked, but it wasn’t always clear what format to use, and it was easy to make small errors.
With the new update, you can select the time using a dropdown picker. It’s a faster and more user-friendly way to set times accurately and consistently, especially when scheduling multiple tasks across your team.
Here’s how to set the time:
- Open a task and click on the start or due date field.
- Click the clock icon next to the time input.
- Use the dropdown to select the hour and minutes.
- The time will be saved automatically.
If you prefer, you can still type in the time manually, but the dropdown helps avoid formatting mistakes and makes the process smoother overall.
Wrapping Up
These updates are all about making task planning more intuitive and precise. Start dates help you plan ahead with more clarity, while the new time picker makes scheduling faster and easier. We hope they make your workflow just a little bit smoother. Let us know what you think—we’re always listening.


